Most coders will use print during their whole life without actually coding it. However, it is a fun exercise.
The framebuffer
Given you are on linux you probably have a device named /dev/fb0 if you don't, you can't do this. The framebuffer is a view of the linear graphical memory used by your video card where what you see on the screen is stored ... at the condition you are in console mode and you have the rights.
On my debian centric distribution, to give the_user permissions to write in the framebuffer I must add the_user to group_video. This can be done with
sudo adduser the_user video or sudo vigr.Then, you have to be in console mode. To switch from xorg/wayland to the console back and forth I use the Ctrl + Alt + Fn combination to switch off from X and Alt + Fn to switch back to X (it's called switching the virtual console).
Once this is done you check you have rights by doing
cat /dev/urandom > /dev/fb0which should fill your screen with random colors and insult you stating there is no more room left on the device. SNAFU : everyhting works as intended.
The pixel
Framebuffer don't know about pixels made of Red, Green, Blue and alpha (given you have a video card that is less than 20 years old), they are just made of memory. We will have to slowly build up our understanding of what this is all about.
The in memory layout may differ according to the hardware, some are having a RGBA layout, mine, the i915 is having a BGRA layout. The following example may need to be rewritten with different hardware if the output is not consistent with your assumption.
Determining the memory layout and coordinates
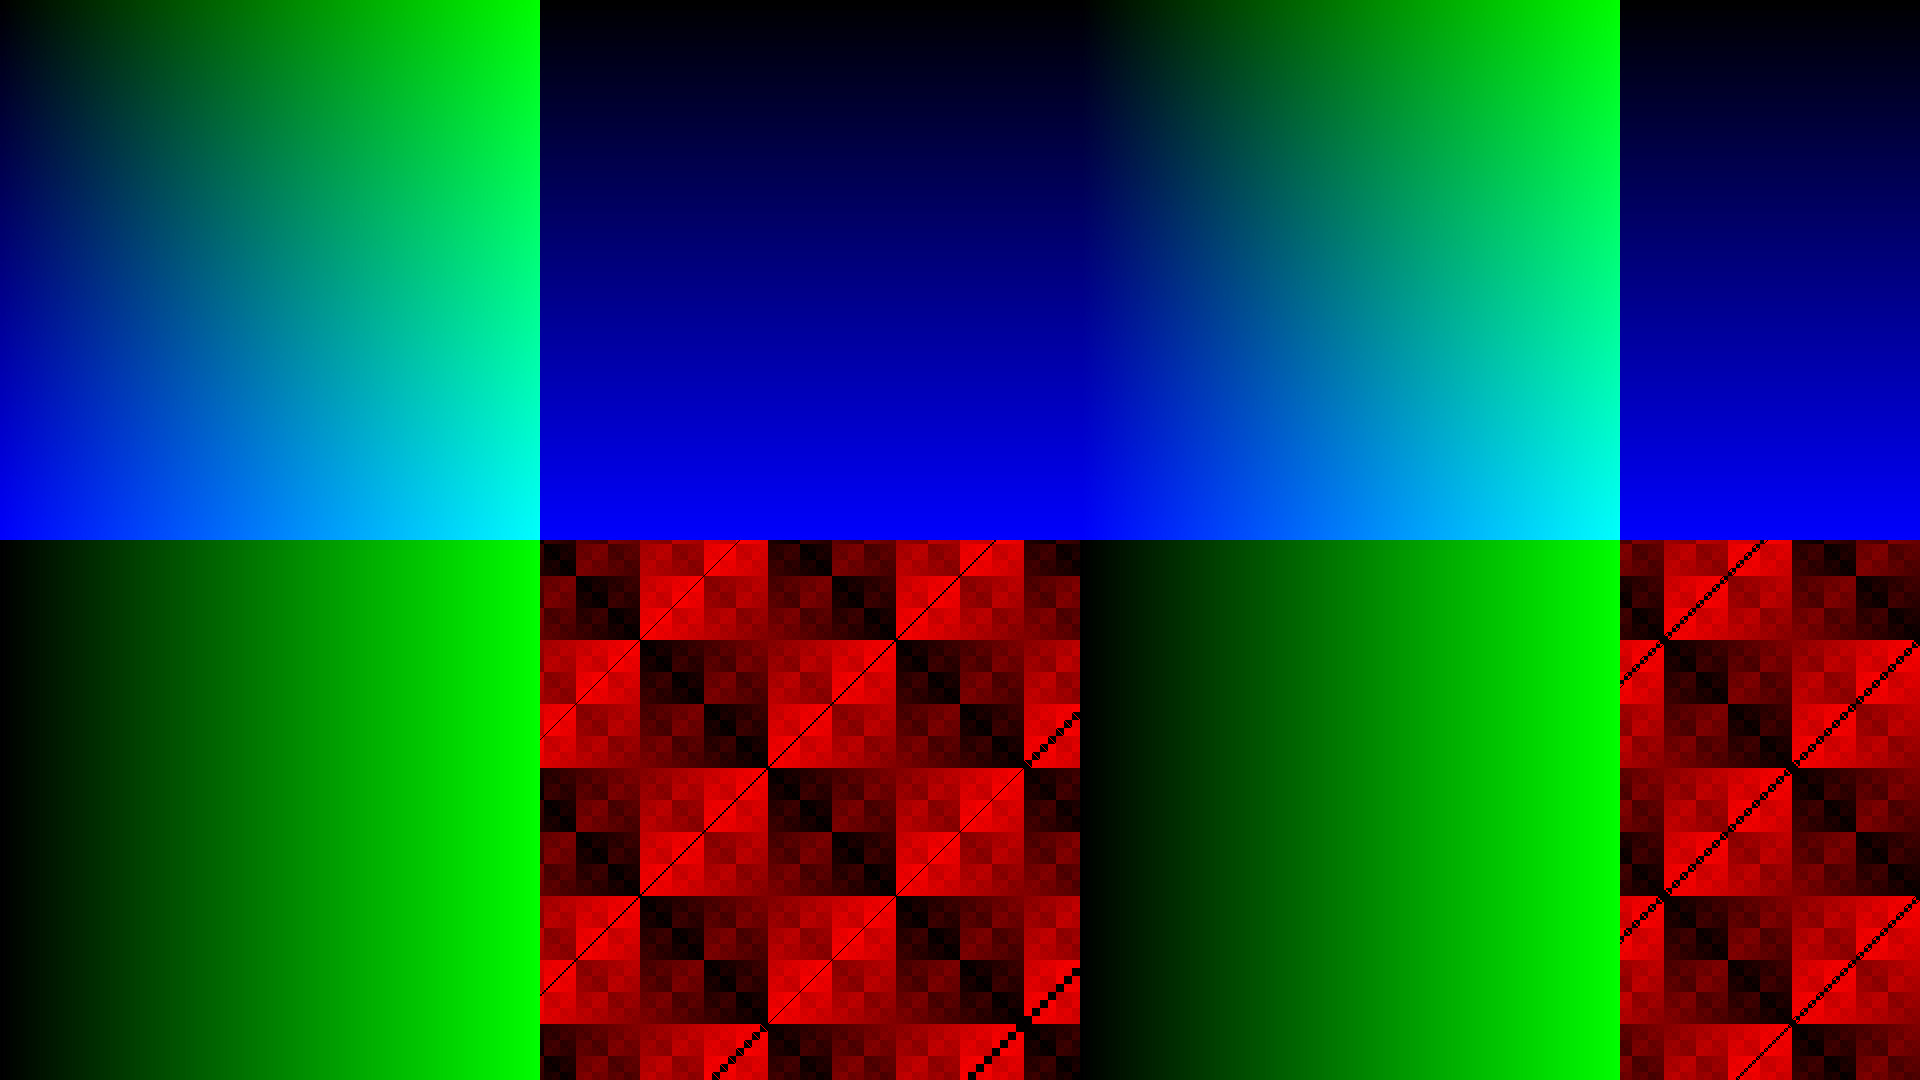
We will do a test and validate code session : first we make assumption on where the colours are by writting 3 squares of Red, Blue and Green on the screen, then, we will snapshot the screen.
$ cat fb.py
#!/usr/bin/env python3
from struct import pack
w,h =map(int, open("/sys/class/graphics/fb0/virtual_size").read().split(","))
midx = w//2
midy = h//2

encode = lambda b,g,r,a : pack("4B",b,g,r,a)

with open("/dev/fb0", "wb") as f:
    for y in range(0,h):
        for x in range(0,w):
            f.write(encode(
                not x%100 and 0xA0 or x<midx and 0xFF or 0, #blue
                y<midy and 0xFF or 0,                       #green
                x>midx and y>midy and 0xFF or 0,            #red
                0,
            ))
The only « trick » is the use of pack to encode the four colour bytes in a byte array that is written to the framebuffer filehandler.
If the code works correctly we should validate the following assumptions:
- coordinates are such as 0 is top left of the screen where green and blue should superpose
- my 1920x1080 screen should have 19 weired stripes (hence validating the geometry)
- each colours should be in its square, red bottom right, green top right, blue bottom left.
- RAM as a char device is accessing a low level file
- a magic number P3 followed by
- width
- height
- the maximum colour value (here 255)
- the 3 colour bytes Red, Blue, Green without Alpha value per pixel
The code for this is straigh forward :
$ cat snap.py
#!/usr/bin/env python
from struct import unpack
w,h = map( int,open("/sys/class/graphics/fb0/virtual_size").read().split(","))

# returns b g r a
decode = lambda pixel : unpack("4B", pixel)

def pr(b,g,r,a):
    print("%d %d %d" % (r,g,b))

print(f"""P3
{w} {h}
255
""")

with open("/dev/fb0", "rb") as fin:
    while pixel := fin.read(4):
        pr(*decode(pixel))
Here the only trick is we use the symetrical function of pack, unpack to decode the pixel in the four colour bytes.wrapping up part one
Asumming you can install fim the framebuffer image wiewer and you installed imagemagick : you can now do
./fb.py && snap.py > this.ppm && convert this.ppm this.jpg && fim this.jpgDoing so, you should have the same picture showing twice without an error like this :

No comments:
Post a Comment